Summary
To remove a partition on Windows 11:
Want to get rid of apartitionfrom your Windows 11 PC so you canreallocate the space to an existing partitionor create a new partition? We’ll walk you through multiple ways you’re able to remove Windows 11 partitions.
What Happens When You Delete a Partition on Windows?
When you delete a partition, Windowserases the contents of that partitionand removes the partition from appearing anywhere on your PC. You lose all the content saved on that partition.
In case you don’t already know, a partition basically lets you split yourhard disk driveorSSD driveinto multiple, independent virtual drives. In this mechanism, each virtual drive is treated as if it’s an actual physical drive.

Sincedeleting the partitionremoves the partition’s contents, ensure you’vebacked up your important filesfrom it before beginning to remove it.
How to Delete a Partition on Windows 11
To remove a partition on Windows 11 using graphical methods, use the Settings or Disk Management tools as described below. If you prefer command-line methods, use PowerShell or Command Prompt, which are also described below.
Each method achieves the same end result, so feel free to use the method you like.

Using Settings
To use Settings to remove your partition,open the Settings menuby pressing Windows+i. In Settings, navigate to System > Storage > Advanced Storage Settings > Disks & Volumes.
Find the partition to delete, and next to it, click “Properties.”

On the following page, in the “Format” section, click “Delete.”
In the open prompt, choose “Delete Volume.”

Windows will begin removing the selected partition from your PC.
Using Disk Management
To use Disk Management to remove your partition,open the toolby right-clicking your “Start” menu icon (or pressing Windows+X) and choosing “Disk Management.”
On the tool’s window, find the partition to delete. Right-click this partition and choose “Delete Volume.”

In the open prompt, select “Yes.”
Disk Management will begin removing your partition, and you’re all done.

Using PowerShell
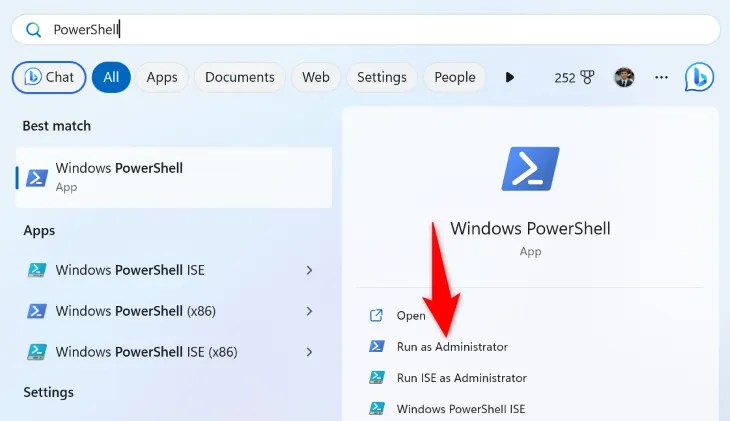
To use a command to remove your partition, start by opening the “Start” menu, finding “PowerShell”, and clicking “Run as Administrator.” In the “User Account Control” prompt, choose “Yes.”
On the PowerShell window, type the following command to retrieve a list of all your partitions:
In the partition list, find the letter for the partition you want to remove. Then, run the following command replacingEwith the letter of your partition.
PowerShell will start removing your partition.
Using Command Prompt
To use Command Prompt to delete your partition,open a CMD windowby accessing your “Start” menu, locating “Command Prompt”, and clicking “Run as Administrator.” In the “User Account Control” prompt, choose “Yes.”
In Command Prompt, type the following commands, pressing Enter after each line:

From the “Volume ###” column, find and note the number for the partition to remove. Then, run the following command replacingXwith your partition’s number:
Your partition is now selected. To delete it, run the following command:

Let Command Prompt delete your partition, and you’ll be all set.
What Can You Do After Deleting a Partition?
After you’ve removed a partition on your Windows PC, you can keep the reclaimed storage space as is, allocate the space to an existing drive (partition) on your PC, or create a completely new partition.
Allocate the Reclaimed Storage Space to an Existing Partition
Toextend an existing partition’s storage limitby giving it your deleted partition’s space, you’ll have to make sure that both your unallocated space and your existing partition are next to each other in Disk Management. If they aren’t, you can’t give your unallocated space to your partition.
Once you’ve confirmed both your unallocated space and your partition are next to each other, then on your existing partition, right-click and choose “Extend Volume.”

In the wizard that opens, click “Next.” On the following page, in the “Selected” menu, select your unallocated space. Then, at the bottom, click “Next.”
On the following page, choose “Finish” to begin allocating your unallocated storage space to your selected partition.
Related:How to Combine Multiple Partitions Into a Single Partition
Create a New Partition From Unallocated Space
Tomake a new partitionout of your unallocated storage space, open Disk Management, right-click your unallocated space, and choose “New Simple Volume.”
On the wizard’s first screen, click “Next.” On the following page, in the “Simple Volume Size in MB” field, enter the size for your new drive. Then, click “Next.”
On the following screen, assign a drive letter to your new partition using the “Assign the Following Drive Letter” drop-down menu. Then, click “Next.”
The following screen asks how you’d like to format your drive. On Windows, you’ll normally format your drives in theNTFS format. To do that, enable the “Format This Volume With the Following Settings” option.
Then, click the “File System” drop-down menu and choose “NTFS.” Keep the “Allocation Unit Size” option as is. Click the “Volume Label” field and enter a name for your drive.
Then, at the bottom, choose “Next.”
On the final screen, click “Finish” to begin making your new partition.
Once this partition is ready, you’ll see it inyour File Explorer utility.
And that’s how you delete a partition on your Windows 11 computer.
Related:How to Resize a Partition on Windows 10
